The problems encountered during external cylindrical grinding
Clamping deformation
Due to the characteristics of the component’s external dimensions and its inherent flexibility, slight variations occur in the components during clamping, which subsequently affects product quality, as illustrated in Figure 1.
the roundness and coaxiality of parts
The two machining reference points for affecting the roundness and concentricity of the component are the inner bore and the core shaft. The inner bore of the component has an interference fit with the small tapered core shaft. Wear of the core shaft or poor contact between the tip and the center hole may cause excessive runout. In the previous machining step, the inner bore was processed using a lathe, and deformation during clamping could result in the inner bore taking on an elliptical shape, thereby affecting the machining accuracy of the outer circle.
The size of the parts
Graphite material has significant toughness, and when graphite components are clamped on the core shaft, the conical shape of the core shaft causes the component to be stretched by the core shaft, resulting in deformation. This deformation leads to the actual dimensions of the component being smaller, causing an excessive tolerance.
Various defects occur on the surface of parts
During the grinding process of graphite material components, due to their relatively soft texture, various defects can occur on the component’s surface due to factors such as abrasive particle size and grinding methods:
1Polygonal defects: There are evenly spaced straight-line marks along the axis direction on the component’s surface.
2Spiral defects: The grinding surface exhibits a spiral pattern.
3Scratches or grooves: Noticeable incised grinding marks appear on the surface, varying in size and length.
解决方案
Choice of grinding wheel
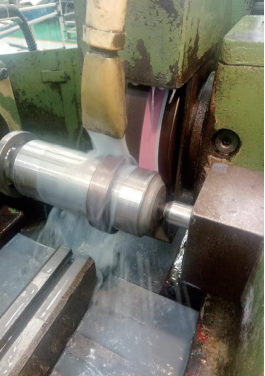
The characteristics of the grinding wheel (abrasive material, grain size, hardness, bonding agent, and wheel structure, etc.) play a crucial role in the quality of grinding the external circumference of graphite material components. If the grinding wheel selection is inappropriate, it becomes difficult to achieve the required surface roughness of the graphite component. Furthermore, the cutting performance of the grinding wheel needs to be ensured. When processing graphite components, choosing a slightly harder grinding wheel with abrasives that do not easily detach can prevent loose abrasives from adversely affecting the machining surface while maintaining the sharpness of the grains. The machining process of the components is illustrated in Figure 2.
Improve cylindrical grinding method
Generally, processing is carried out using rough and finish grinding methods. During rough grinding, a large amount of stock is left on the component, and transverse feeding is employed. Due to the significant contact area between the grinding wheel and the graphite component, heat generation during grinding is common, so adequate cooling is essential during rough grinding. For finish grinding, longitudinal feed grinding is used, with transverse feeding during the grinding process. The grinding wheel removes a smaller amount of material, effectively ensuring the machining precision and dimensional requirements of the component.
Improve method of mounting parts
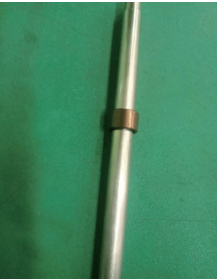
Generally, the outer diameter is machined using a tapered mandrel with an interference fit between the graphite component and the mandrel, so the clamping force should be appropriate. The clamping of the component is shown in Figure 3. Typically, a larger clamping force is used during rough grinding because, during this process, the feed rate is relatively high, and the component experiences compression. Moreover, the grinding forces acting on the component are significant. Using a larger clamping force helps prevent relative movement between the component and the mandrel. During finish grinding, when there is no relative movement between the component and the mandrel, it’s better to have a smaller clamping force. This is to prevent elastic deformation of the graphite component due to being expanded by the mandrel, which could affect the component’s dimensions. The interference fit is generally 0.005 to 0.1mm during rough grinding and 0.003 to 0.005mm during finish grinding.
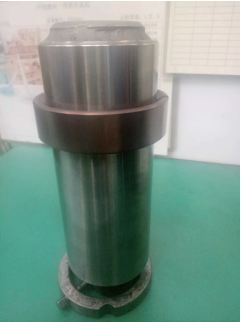
Graphite products processing examples
The component material is grade M125P, characterized by its lightweight and low density, making it a brittle material. The machining blueprint requires a coaxiality of 0.01mm between the inner hole and outer diameter, with a surface roughness value of Ra=0.8μm. It is processed using an M1420A external cylindrical grinder, following the RT Inspection 03 table for size matching. Gap values are calculated and filled into the RT-40 table, and the machining is carried out with a mandrel. The post-grinding component is shown in Figure 4.
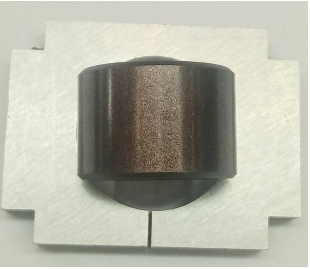
Actual process analysis
The two machining benchmarks for coaxiality are the component’s inner bore and the outer diameter of the mandrel. Wear on the mandrel or poor contact between the tip and the central hole can cause excessive runout. In the previous process, the component’s inner bore was machined using a lathe, and there was deformation during clamping, which could result in the inner bore being elliptical and thus affecting the machining of the outer diameter.
Elastic deformation of the component and the clamping force during fixation can affect machining precision and lead to measurement errors. The greatest challenge in machining is the surface roughness of the graphite component’s outer diameter. Since graphite is a non-metallic material, the mixture of abrasive particles from the grinding wheel and the cutting fluid can scratch the surface of the workpiece. Tiny particle impurities in the circulating cutting fluid can also enter the grinding area, causing scratches. Wheel dulling can result in multiple edges or spiral thread defects on the workpiece’s surface.
Solutions for the practical instance
Guarantee the coaxiality of the parts
The mandrel is measured with a lever dial indicator on an offset indicator before use to ensure that the runout of the outer diameter at both ends of the mandrel to the center hole is less than 0.005mm.
Guarantee the size of the parts
The machining of the component is divided into rough and finish grinding stages.
During rough grinding, surface roughness and deformation are not considered; the goal is to leave an allowance for subsequent finish grinding. The machining process adopts a positioning cutting method with a relatively large feed rate, and it is carried out in multiple passes with a feed rate controlled between 0.01 to 0.02mm/r. The clamping force between the component and the mandrel is slightly greater, with an interference fit of approximately 0.005 to 0.01mm, which helps improve work efficiency.
During finish grinding, the component’s dimensions are measured first. If the component has deformed and exhibits an elliptical shape or if the cylindricity exceeds 0.01mm, it undergoes a reaming process to ensure dimensional accuracy. The clamping force during this stage should be moderate, with an interference fit between the mandrel and the component controlled within the range of 0.003 to 0.006mm. This minimizes elastic deformation of the clamped component, ensuring geometric tolerances are maintained. Grinding is performed using a reciprocating feed method, with a feed rate ranging from 0.001 to 0.005mm/r. This results in a smaller depth of cut and less grinding material, reducing the duration of pressure application during grinding and allowing for more precise size matching.
Guarantee the surface roughness of the parts
During finish grinding, the wheel wear is minimal, and typically, removing 0.05mm of material is sufficient to restore the wheel’s cutting performance. The correction speed should be slower, around 150 to 200mm/min. Finally, a polishing step is performed to remove any individual protrusions and loose abrasive grains from the wheel’s surface.
selection suitable cutting fluid
During the machining of graphite material components, it’s essential to ensure that the cutting fluid is clean. The machine tool should be equipped with a filtration system to prevent abrasive particles dislodged from the wheel from scratching the workpiece surface or tiny particle impurities from mixing into the circulating cutting fluid and entering the grinding zone.
Fixed value measurement
After the graphite components are finished machining on the machine tool, they need to undergo a constant temperature setting, and measurements are taken once the components have stabilized. Subsequently, gap values are calculated based on the corresponding table and recorded.
结论
This article has addressed the issues encountered during the external cylindrical grinding of graphite components and provided solutions while summarizing and sharing experiences and techniques in grinding processes. When machining graphite material components, it is crucial to conduct a careful process analysis, taking into account the material’s inherent characteristics and the requirements of the drawings. Proper fixture selection, grinding wheel choice, and grinding methods should be employed to address problems such as clamping deformation, dimensional deviations, and surface defects in order to produce high-quality products.
